Archive for September, 2012

September 29, 2012

Gluten free, soy free, egg free banana cake

by 田草川(たくさがわ)かおる

Hi this is KK, Sushi Artist / Healthy Muffin Maker / Mum 🙂

Thank you for visiting my blog.


I have been making a lot of vegan sweets (no egg, no butter, no honey, no milk) but as I was talking to a staff at Yumi’s day care, I found out that some kids can’t even eat soy. So, I came up with this gluten free, soy free vegan recipe that is versatile and can be made in any shapes and size.


20120929-173053.jpg 
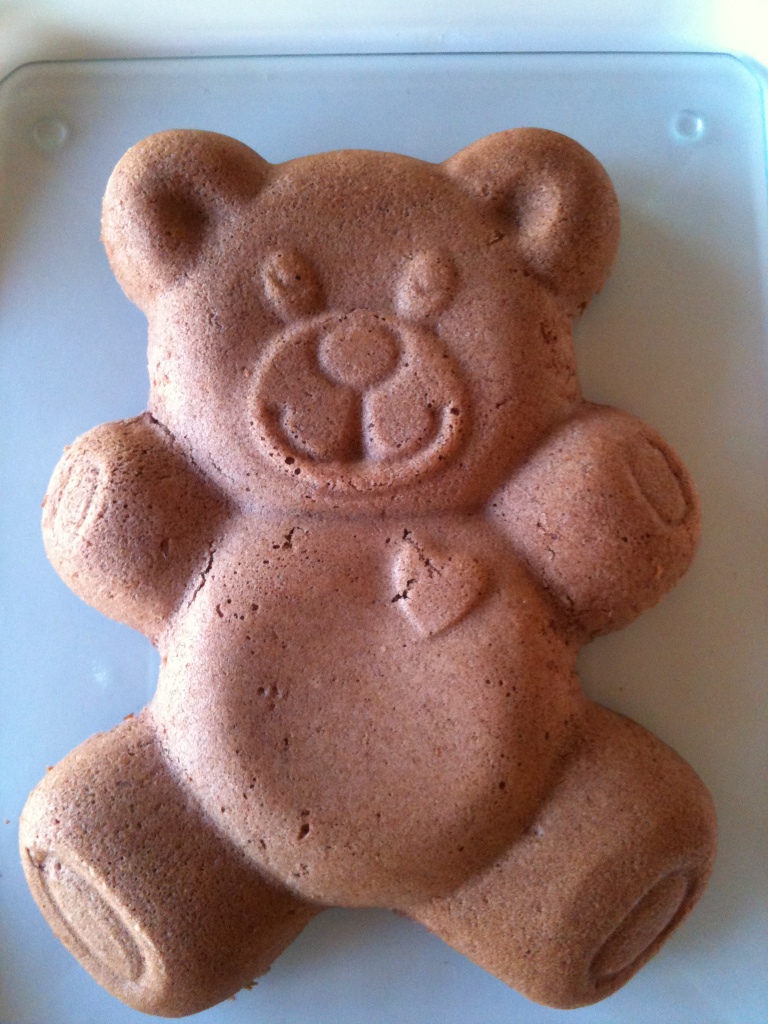
I used a tarte tin (20cm size) and made it flat. This was a good idea because it only took 15 min to bake. If you use something like a pound tin, I think it will take about 25min. Next time, I might try baking it in my mini muffin tin and see how that goes.

Ingredients (for my 20cm tarte tin )

-160g very ripe bananas, mashed (about 3 small bananas/2 large bananas)

-3 Tablespoon Organic raw sugar

-60g cold press oil (I used rice bran oil)

-70g water

-130g Rice flour

-30g Corn flour

-2 Tablespoon Aluminium free baking powder


Method

Step 1: Mix all the wet ingredients (banana, oil, water and sugar) in a large bowl; mix all the dry ingredients (rice flour, corn flour, BP) in a large bowl.

Step 2: Pour the wet ingredients into the dry ingredients and mix well. The great thing about rice flour is you don’t  have to worry about over beating. Mix well, pour into a tin and bake at 180C (pre-heated oven) for 15min, or until a skewer comes out clean.


If you don’t have to worry about allergies, I think adding nuts would be nice. This is the most basic rice flour recipe, and I will try to come up with more variations.


Happy cooking!


September 29, 2012

Easy Breakfast Bread

by 田草川(たくさがわ)かおる

Hi this is KK, Sushi Artist / Healthy Muffin Maker / Mum 🙂

Thank you for visiting my blog.

I am not sharing my Japanese recipes these days. Sorry about that! It’s funny because I cook it everyday, but keep on asking myself ,

“Is this worth sharing?”

Then I say “Nah, it’s too simple.” and end up not writing about Japanese food, but more about healthy baking. Oh well,  that’s the reality of Japanese home style cooking. We will have rice and miso soup every day for dinner (almost every day) but the main dish can be very Western/Asian.

Same with breakfast.  At my Nana’s place, she always prepared rice and miso soup and egg and grilled fish for breakfast, plus left overs from the night before, but we don’t eat like that any more! Those meals are only served at Ryokans, when you stay and pay for your breakfast 🙂

For most families, breakfast should be quick and easy, and this is a perfect recipe for busy mums.

I use Triblade from Kenwood to make this bread, and it takes only 20min! Not kidding!

You can use a food processor and make it as fast or even do it by hand. Just measure, mix and bake. That’s all!

20120929-165526.jpg

Quick easy “bread” mix

-150g Hard flour (Do not use bread mix/bread flour because it may have some ingredients other than flour in it)

-1 teaspoon Aluminium free baking powder

-2 teaspoon olive oil

-80g water

Method:

Step 1: Put all the dry ingredients (flour and BP) in Triblade and mix on 3 for 20 sec. Add the wet ingredients and mix on 4 for 30 sec, or until the dough is all sticky and forming a ball.

Step 2: Preheat the oven to 180C, sprinkle some extra flour on a kneading mat (or a clean bench top) and spread the dough (about 20cm wide and 30cm long). Place zucchini/mushroom paste/genovese sauce etc on the dough and roll. Cut into 2cm width and place together to shape a honeycomb (or a tree, square etc). Sprinkle extra olive oil (I use garlic oil) , salt and pepper on top.

Step 3: Bake at 180C for 15min.


Eat it while it’s hot!

The key to this “bread” is to eat it while it’s hot. Because it is so easy and quick to bake, always bake it before you serve. Having no yeast to “raise” the dough, it will get tough as it cools. When it becomes hard, reheat it or serve it with soup. I am sure that they are so good to eat, you don’t have to worry about having left overs!

Happy Cooking!

September 27, 2012

Basic recipe : No egg, No butter, No sugar Cake

by 田草川(たくさがわ)かおる

Hi this is KK, Sushi Artist / Healthy Muffin Maker / Mum 🙂

Thank you for visiting my blog.

Ever since we moved to the new house, I kind of stopped making muffins for Yumi. She is a big girl now (already two!) and prefers to eat “like a big girl”, so instead of baking muffins, she eats cake slices. On a plate!

So I had to come up with a healthy cake recipe and here is my basic one. This is made to suit this :

20120927-141003.jpg  A baking dish!

It’s not even a cake tin, just something I bought as an emergency. I had to bake a egg-less birthday cake for 20 children for my friend, and since I didn’t have a cake tin that size, I just bought this. It was only about $5, I thought I’d only use it once, but since the cake was so popular, I still continue to make basic cake with this.

This year, Yumi’s Alpaca cake and Elmo cake were made using this tin and this recipe.

Ingredients : for a regular baking dish

-300g Organic Plain Flour

-20g Corn flour

-1 Tablespoon Aluminium free baking powder

(You can add 1 Tablespoon Cocoa powder to make the cake chocolate color)

-300g Organic soy milk

-100g Rice bran oil (or any other cold pressed oil, be careful when using olive oil, you  might need to add vanilla or cocoa to moderate the aroma)

-100g Organic maple syrup

Method

Step 1 : In a large bowl, mix all the dry ingredients (flour, BP)

Step 2: In a large bowl, mix all the wet ingredients (soy, oil, syrup); Add dry ingredients into the dry ingredients and mix, pour into baking dish and bake on 180C oven for 15min.

DONE!

Too easy? Yes, you only use 2 bowls and everything is done in 20min. I usually put my bowls on a digital cooking scale and weigh everything as I prepare them. It is better to line your baking dish with baking paper so the cake will come out without a hassle.

To make Alpaca cake, simply cut the cake in half, cut out the shape of Alpaca; and decorate with whipped cream.

  I always layer my cake to give it height. Egg-less cakes don’t rise that much, so I think it is better to make thin layer and put it on top of each other. I used organic apricot jam to connect the two pieces. The shape of alpaca is free hand cut… Luckily, it is a combination of rectangles so it’s not that hard. Good luck with the piping!

My tip, do in between the legs first.

Happy Cooking!

September 22, 2012

Banana Carrot Cake, No Egg, No Butter, No Sugar

by 田草川(たくさがわ)かおる


Hi this is KK, Sushi Artist / Healthy Muffin Maker /Mum:-)


Thank you for visiting my blog.


After eating so many fancy cakes for her birthday this week, the las cake she asked for was a simple banana cake.

20120922-171904.jpg I tried to make it as pretty as possible, using my special ring tin.


I don’t usually use this tin because it takes longer to cook, but every once in a while, it is nice to make something different 🙂


What was interesting was that Yumi’s grandparents, who are both not so fond of sweet things, ate this cake, and even had second helpings! That’s a nice compliment to recive 🙂 Better write down the recipe before I forget!!!


Ingredients

-240g very ripe Banana (almost all brown outside), mashed

-100g Carrots, grated

-100g Rice bran oil

-50g Organic Honey

-100g Organic soy milk


-300g Organic plain flour

-2 Tablespoon Aluminium free baking powder

-1/2 Tablespoon Cinnamon

-30g walnuts, chopped


Method

Step 1: Mix all the wet ingredients  (banana, carrots, oil, honey, soy) in a large bowl

Step 2: Mix all the dry ingredients (flour, BP, cinnamon, walnuts) in a large bowl, pour dry ingredients into wet ingredients and mix

Step 3: Pour into a greased tin (I lightly floured my tin as well) and bake at 180C for 30min, or until a skewer comes out clean.


Better save some banana to ripen so I can make it again!


September 22, 2012

Teddy Bear Cake_No Egg, No Sugar, No Butter

by 田草川(たくさがわ)かおる

Hi this is KK, Sushi Artist /Healthy Muffin Maker / Mum 🙂

Thank you for visiting my blog.


This is my 4th Cake this week, two for Yumi’s Birthday (Alpaca cake & Elmo Cake), one for a friend and this teddy is going to a Teddy Bear Charity Picnic organized by Hillview Playgroup Mother’s tomorrow! We do this charity picnic every year, and the proceeds go to Westmead Children’s Hospital. Something that I am happy to support being a mum myself. Hope we can bring some smiles on children’s faces.

20120922-132955.jpg I use Wilton’s teddy bear cake pan for this cake, and it is quite big. I used it twice for Yumi’s birthday last year.

This year, I decided to use my Basic No Egg, No Butter, No Sugar cake recipe, just bigger than usual.

This is not a recipe, but more like a memo to myself so I can bake it again next year without a hassle!


Ingredients (for 1 Wilton Teddy Bear Cake tin)

-440g Organic Plain Flour

-30g Corn flour

-10g Cocoa powder

-25g Aluminium Free Baking Powder

-450g Organic Soy milk

-150g Organic Maple syrup

-150 Rice bran oil (or grape seed oil, use cold pressed)


Method

Step 1: Mix all dry ingredients (flour, corn flour, cocoa powder, BP) in a large bowl; Mix all the wet ingredients (soy milk, syrup, oil) in a large bowl; Pour dry into wet, mix and bake at 180C for 20min.

I had to put some foil on the top for the last 5min because it started to brown. Very quick and easy, there is only 1 step to it!


Just remember to grease the tin well, I sprayed some oil, than tipped in extra flour to coat it. It came out nicely! Also, when you pour the mixture into the tin, use a knife and try to “cut” the center of body, arms and legs, pushing the mixture to the side of the pan as possible. This will make the mixture rise as flat as it can, if you don’t do this (which I did not last year) the center part will rise more than the other parts.


One more tip, before turning it out onto a cooling wrack, “cut/scrape off” the crust at the top (I should have taken a photo of it! sorry) If you don’t do this (which I did not last year), sometimes the arms and legs can break off (due to the unevenness of the surface/base). I hope you understand my tip, let me know if you need help in detail.


This recipe is super easy, super fast and no mistake can happen! Trust me, I’ve done it more than a dozen times, and it always comes out right!


September 20, 2012

Yumi’s Birthday Cake (daycare)

by 田草川(たくさがわ)かおる

Hi this is KK, Sushi Artist/ Healthy Muffin Maker / Mum 🙂

Thank you for visiting my blog.


This is the second birthday cake I made for Yumi this year, and it was for her daycare. Yumi was lucky enough to have her special day celebrated with her friends.


She didn’t request anything, but I decided to do an Elmo cake, since this is one of her favorite characters. And it was interesting for me to make.


20120920-142539.jpg For base, I used my No egg, No butter, No sugar cake, and used a bowl to make the shape.

When I made the Cookie Monster Cake, I used the same bowl, and some marshmallows for the eyes, but it took forever to consume the leftover marshmallows so I decided to use sponge for it this hear.


Can you guess the size from Elmo’s nose?


That’s an apricot.


It is filled with apricot jelly (better to use up the can because I only wanted 1 for the nose) and I used 300g full cream for the decoration. Takes a while for the jelly to set, to better bake the cake the day before, and do the decoration in the morning (Piping only took about 10min).


We enjoyed it with 10 small friends (Yumi is the eldest in her class) plus the staff, but I had to take about a quarter home. Daddy enjoyed it for dessert after dinner! I wonder what I should do on Saturday, for a family birthday party…

September 20, 2012

Yumi’s Brthday Cake (playgroup)

by 田草川(たくさがわ)かおる

Hi this is KK, Sushi Artisit / Healthy Muffin Maker / Mum 🙂

Thank you for visiting my blog.

My dearest daughter Yumi turned 2 on Sunday, and we did a special Sydney marathon that day, but before and after the big event, I had some birthday cakes to bake.

Here is the one that I made for playgroup. Can you tell what it is?


20120920-142430.jpg 

It’s an Alpaca!

Ever since we met an alpaca at Shoalheaven, Yumi fell in love with this animal.

She talks about it, she dreams about it, and for her birthday, she decided to eat it!

The base is using my No egg, No butter, No sugar cake recipe, I used some full cream as a decoration with as little raw sugar as possible. If you don’t like the cream, you can take it off, it’s only for the special occasion.

Shared between 12 little friends and parents, this was a perfect size for a happy day!


*I’ve been asked how much cream is required, I whipped 300g full cream with 30g sugar, this was enough to cover the cake and 2, with some remaining. Maybe 250g is enough.

September 20, 2012

Sushi Art class for October

by 田草川(たくさがわ)かおる

Hi, this is KK, Sushi Artist/ Healthy Muffin Maker / Mum 🙂

Thank you for visiting my blog.


We had guests coming from Japan in August and September, so there were lots of cooking to do. I love it when there are lots of people around, another excuse to cook some extra meals.

Now that they are all gone, and all I have to do is count down until our end of year holiday, why not enjoy cooking some more Sushi Art!
Menus for October

-Jack-o-Lantern

-Ghost

Dates for Classes in October 2012:24th (Wed), 25th (Thur)

Menus will change every month. I try to be seasonal as possible, and October is a good chance to roll these Spooky Sushi!
20120920-141722.jpg


You can come with your baby/toddler and take a lesson in the same room with your child! However, as it is not a childcare facility, please look after your own child. The class will be conducted in a way so that you can alway give your baby a cuddle when they become a bit restless. If it becomes too difficult, you are welcome to observe and take a substitute class on a different day. I know what it’s like to cook with babies!

Time: 10:30-13:00 (Please stay longer if possible for sit down taste-testing time, drinks and miso soup provided with 2 slices of sushi made by me)

Place: Private home in North Shore (Address given at time of enquiry)

Cost: $50 per person (Includes ingredients, recipe to take home, sit down lunch)

Class size: 2-4 people

What to bring: Apron and a box to take home your sushi

For bookings and further enquiries: Please send me a message or leave a comment, and I’ll get back to you:-) There’s an event page in my Facebook too!

Thank you and hope to see you soon!

Thankou all for coming to the Sushi Art classes in May. A class for Mums were full of laughter with babies crawling and toddlers rolling sushi with his mum! My classes are easy and fun for people of all ages and everyone loves to eat what they made!

Menus for June

-Tulip

-Clover (Vegan)

Dates for Classes in June 2012:20th (Wed), 21st (Thur)

Menus will change every month.

You can come with your baby/toddler and take a lesson in the same room with your child! However, as it is not a childcare facility, please look after your own child. The class will be conducted in a way so that you can alway give your baby a cuddle when they become a bit restless. If it becomes too difficult, you are welcome to observe and take a substitute class on a different day. I know what it’s like to cook with babies!

Time: 10:30-13:00 (Please stay longer if possible for sit down taste-testing time, drinks and miso soup provided with 2 slices of sushi made by me)

Place: Private home in North Shore (Address given at time of enquiry)

Cost: $50 per person (Includes ingredients, recipe to take home, sit down lunch)

Class size: 2-4 people

What to bring: Apron and a box to take home your sushi

For bookings and further enquiries: Please send me a message or leave a comment, and I’ll get back to you:-) There’s an event page in my Facebook too!

Thank you and hope to see you soon!

September 12, 2012

Thank you for coming to Sushi Art Class

by 田草川(たくさがわ)かおる

Hi this is KK, Sushi Artist / Healthy Muffin Maker / Mum 🙂

Thank you for visiting my blog.

20120912-161441.jpg We had a fun time making Panda Sushi and Train Sushi today!

Thank you for coming 🙂


It was the first time to do a Sushi Art class at my new house, and  things were everywhere, but I hope everyone had a fun time.


At least, the sushis were popular! Too cute to eat 🙂


We used Plum Vinegar to season the rice today, and it went great. I think it’s much easier and healthier, especially if you want to eat sushi often. Sushi vinegar sold at supermarkets are quite high in white sugar, so be careful if you are on a diet!


Next month, we will be making HALLOWEEN Sushi! I can’t wait to share the photos 🙂


Enjoy your food!

September 11, 2012

Weekday Dinner

by 田草川(たくさがわ)かおる

Hi, this is KK, Sushi Artist / Healthy Muffin Maker / Mum 🙂

Thank you for visiting my blog.


It’s been a while since I last introduced our family dinner, and thought I’d share a recipe or two.


Tonight was simple as usual, the Menu was (starting from the top)

-Spinach in sesame dressing

-Eggplant and onion in miso paste

-Pan fried chicken with plum flavor

-Koya-Tofu (dried tofu cooked in Japanese broth)

-Miso soup

-Hijiki rice

20120911-210135.jpg 


Very simple, easy to cook with lots of veggies.


At the moment, Yumi is really into Hijiki Rice, and will eat 2 bowls! I try to make a lot of it and keep stock in the fridge for emergencies.


Here is the recipe

Hijiki Rice

-2 cups rice (Japanese standard = 360cc)

-10g Hijiki (it is a type of seaweed)

-2 Tablespoon dried anchovies (you can use canned tuna in water)

-2 Chikuwa (Japanese fish cake)

-2 Deep fried bean curd, (pour cupful of boiling water over it to remove excess oil)

-1/2 carrot

-2 1/2 cup liquid (including 2 Tablespoon soy sauce, 2 Tablespoon mirin)


Method

Step 1: Soak Hijiki in water for 15min, wash rice under running water, drain and soak in clean water for at least 30min.

Step 2: Chop chikuwa, bean curd and carrot into small pieces

Step 3: Drain rice, place in a thick pot (I use Le Creuset), place chopped ingredients, hijiki, anchovies and pour liquid; Cook on high heat for 8 min, then on small heat (VERY SMALL) for 12 min, wait 10 min and remove lid.


Enjoy it hot or in OMUSUBI style!