Posts tagged ‘No sugar’

November 12, 2012

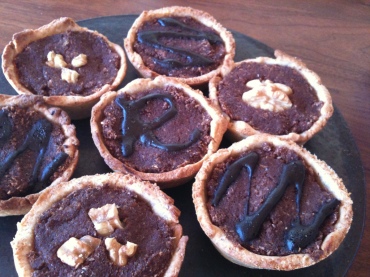
Vegan okara tart

by 田草川(たくさがわ)かおる

Hi this is KK, Sushi artist, Healthy Muffin Maker, Mum 🙂
Thank you for visiting my blog.

20121113-100212.jpg

I made this tart with my daughter Yumi, who’s 2 and in love with rolling play dough. She happily rolled this tart base and we made mini tarts using our muffin tin!

My husband liked it better than my okara cakes, so it must have been good. Would have added something like Countreau if it wasn’t for the kids!

October 21, 2012

Gluten free rice flour cake, okara base

by 田草川(たくさがわ)かおる

Hi this is KK, Sushi Artist/ Healthy Muffin Maker/ Mum 🙂

Thank you for visiting my blog.

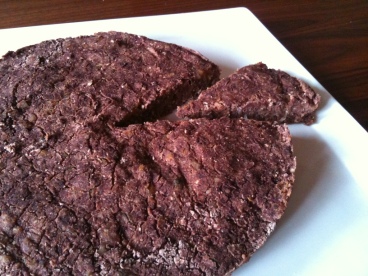
20121022-090821.jpg This cake is amazing.

It has

NO SUGAR

 NO MAPLE SYRUP

 NO HONEY

but it’s still sweet and yummy! The secret is

DATES!

I was reading some raw recipes, and they were using dates as sweeteners. Thought I would try some in my cooking too! I’ve made Dates and walnuts muffins before but in that recipe, I did add raw sugar.

This cake is completely sugarless, but sweet enough for Yumi and me, and you can eat it guilt free 🙂


The base is okara, a residue you get when making soy milk. (Read more about OKARA from Wikipedia)

Okara is low in fat, high in fiber, and also contains protein, calcium, iron, and riboflavin (from Wikipedia), and in Japan it is considered as a “Diet food”, because they are filling and can be used as an alternative for meat. It is not easy to find okara in Australia, but I was lucky because my friend gave me a bagful of frozen organic okara. This was a great opportunity for me to try lots of okara recipes, and this rice flour cake turned out to be a favorite for Yumi.


Ingredients (I used a 22cm round cake tin)

-260g Okara, fresh

-120g Rice flour

-10g Organic cocoa

-1 Tablespoon Aluminum free Baking Powder

-4g Agar powder

-160g water

-130g Chopped dates and walnuts (the ratio is up to you, the more the dates, the sweeter it becomes)


Method

Step 1: Mix everything in a large bowl, pour into a lined cake tin and bake in 180C oven for 20min.


It’s so simple, but  tasty! Yumi ate about a quarter of the cake already.


Agar powder must be something new to some people, so here is a description from Wikipedia. It is made from an algae, and although it saids “is a gelatinous substance”, don’t use gelatin as a substitute. It will not be vegan and it works differently. Agar works as a binder for this cake. I made it without it and unfortunately the cake did not keep its shape. If you don’t have to make it vegan, I would suggest to substitute 1 egg for agar, rather than gelatin for this recipe.


Please try it when you come across okara! I am sure you can make this using firm tofu as a substitute for okara. Will try it myself and let you know!


ENJOY 🙂


October 13, 2012

Gluten free banana cake, revised version

by 田草川(たくさがわ)かおる


Hi this is KK, Sushi Artist/ Healthy Muffin Maker / Mum 🙂

Thank you for visiting my blog.

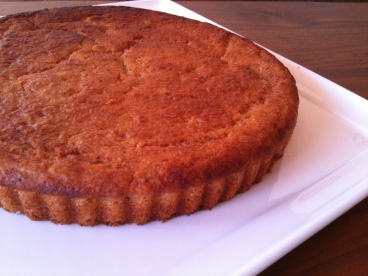
20121013-111042.jpgI tried making gluten free banana cake again, this time without corn flour. Better to keep recipes simple as possible.

Worked really well, Yumi is eating her second slice already:-)

(20 min after the cake is out of the oven)


It is bigger, because the total weight of the banana was 190g instead of 160g, and I had to moderate other ingredients to match it.


As a conclusion, corn flour can be omitted, didn’t realize much difference (although something could have happened 2-3 days after baking, we ate all ours before we could see the change in texture, taste etc)


The key would be the sweetness/ripeness of the banana. Make sure they are brown and soft when you are cooking this cake. I usually buy ripe bananas and stock them until they go spotty to brown. It is easier to mash and handle too!


Ingredients (for my 20 cm stick free tarte tin, non greased, non lined)

-190g banana, very ripe, mashed

-3 Tablespoon Organic raw sugar

-80g cold press oil (I used rice bran oil)

-90g water

-190g Rice flour

-2 Tablespoon Aluminum free baking powder


Method

Step 1: Mix all the wet ingredients (banana, oil, water and sugar) in a large bowl; mix all the dry ingredients (rice flour,  BP) in a large bowl.

Step 2: Pour the wet ingredients into the dry ingredients and mix well. The great thing about rice flour is you don’t have to worry about over beating. Mix well, pour into a tin and bake at 180C (pre-heated oven) for 20 min, or until a skewer comes out clean.


The cooking time will depend on what kind of cake tin you use. If you use a pound cake tin, it will take longer for the center part to cook. This is why I prefer to cook “flat”  or “mini” cakes, because the cooking time is much shorter. Same with my other recipe, if you don’t have allergies, I really recommend adding walnuts to this recipe. It adds flavor and texture!


ENJOY 🙂


October 4, 2012

Gluten free, soy free cookie

by 田草川(たくさがわ)かおる

Gluten free cookie.
Trying new recipes in the kitchen today. Hope to share the “no mistake” recipe soon!

20121004-150542.jpg

20121004-150601.jpg

September 27, 2012

Basic recipe : No egg, No butter, No sugar Cake

by 田草川(たくさがわ)かおる

Hi this is KK, Sushi Artist / Healthy Muffin Maker / Mum 🙂

Thank you for visiting my blog.

Ever since we moved to the new house, I kind of stopped making muffins for Yumi. She is a big girl now (already two!) and prefers to eat “like a big girl”, so instead of baking muffins, she eats cake slices. On a plate!

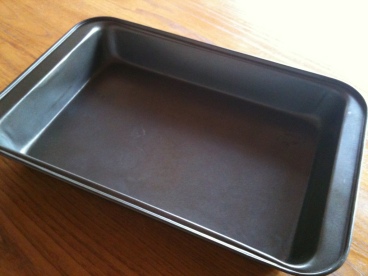
So I had to come up with a healthy cake recipe and here is my basic one. This is made to suit this :

20120927-141003.jpg  A baking dish!

It’s not even a cake tin, just something I bought as an emergency. I had to bake a egg-less birthday cake for 20 children for my friend, and since I didn’t have a cake tin that size, I just bought this. It was only about $5, I thought I’d only use it once, but since the cake was so popular, I still continue to make basic cake with this.

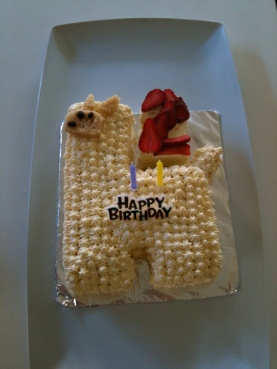
This year, Yumi’s Alpaca cake and Elmo cake were made using this tin and this recipe.

Ingredients : for a regular baking dish

-300g Organic Plain Flour

-20g Corn flour

-1 Tablespoon Aluminium free baking powder

(You can add 1 Tablespoon Cocoa powder to make the cake chocolate color)

-300g Organic soy milk

-100g Rice bran oil (or any other cold pressed oil, be careful when using olive oil, you  might need to add vanilla or cocoa to moderate the aroma)

-100g Organic maple syrup

Method

Step 1 : In a large bowl, mix all the dry ingredients (flour, BP)

Step 2: In a large bowl, mix all the wet ingredients (soy, oil, syrup); Add dry ingredients into the dry ingredients and mix, pour into baking dish and bake on 180C oven for 15min.

DONE!

Too easy? Yes, you only use 2 bowls and everything is done in 20min. I usually put my bowls on a digital cooking scale and weigh everything as I prepare them. It is better to line your baking dish with baking paper so the cake will come out without a hassle.

To make Alpaca cake, simply cut the cake in half, cut out the shape of Alpaca; and decorate with whipped cream.

  I always layer my cake to give it height. Egg-less cakes don’t rise that much, so I think it is better to make thin layer and put it on top of each other. I used organic apricot jam to connect the two pieces. The shape of alpaca is free hand cut… Luckily, it is a combination of rectangles so it’s not that hard. Good luck with the piping!

My tip, do in between the legs first.

Happy Cooking!

September 22, 2012

Banana Carrot Cake, No Egg, No Butter, No Sugar

by 田草川(たくさがわ)かおる


Hi this is KK, Sushi Artist / Healthy Muffin Maker /Mum:-)


Thank you for visiting my blog.


After eating so many fancy cakes for her birthday this week, the las cake she asked for was a simple banana cake.

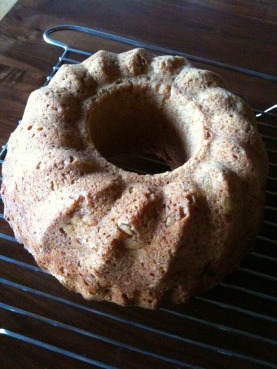
20120922-171904.jpg I tried to make it as pretty as possible, using my special ring tin.


I don’t usually use this tin because it takes longer to cook, but every once in a while, it is nice to make something different 🙂


What was interesting was that Yumi’s grandparents, who are both not so fond of sweet things, ate this cake, and even had second helpings! That’s a nice compliment to recive 🙂 Better write down the recipe before I forget!!!


Ingredients

-240g very ripe Banana (almost all brown outside), mashed

-100g Carrots, grated

-100g Rice bran oil

-50g Organic Honey

-100g Organic soy milk


-300g Organic plain flour

-2 Tablespoon Aluminium free baking powder

-1/2 Tablespoon Cinnamon

-30g walnuts, chopped


Method

Step 1: Mix all the wet ingredients  (banana, carrots, oil, honey, soy) in a large bowl

Step 2: Mix all the dry ingredients (flour, BP, cinnamon, walnuts) in a large bowl, pour dry ingredients into wet ingredients and mix

Step 3: Pour into a greased tin (I lightly floured my tin as well) and bake at 180C for 30min, or until a skewer comes out clean.


Better save some banana to ripen so I can make it again!


September 22, 2012

Teddy Bear Cake_No Egg, No Sugar, No Butter

by 田草川(たくさがわ)かおる

Hi this is KK, Sushi Artist /Healthy Muffin Maker / Mum 🙂

Thank you for visiting my blog.


This is my 4th Cake this week, two for Yumi’s Birthday (Alpaca cake & Elmo Cake), one for a friend and this teddy is going to a Teddy Bear Charity Picnic organized by Hillview Playgroup Mother’s tomorrow! We do this charity picnic every year, and the proceeds go to Westmead Children’s Hospital. Something that I am happy to support being a mum myself. Hope we can bring some smiles on children’s faces.

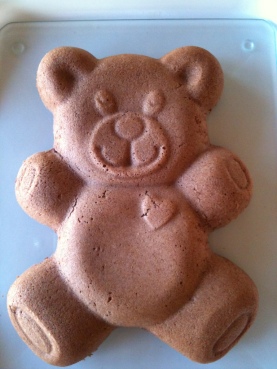
20120922-132955.jpg I use Wilton’s teddy bear cake pan for this cake, and it is quite big. I used it twice for Yumi’s birthday last year.

This year, I decided to use my Basic No Egg, No Butter, No Sugar cake recipe, just bigger than usual.

This is not a recipe, but more like a memo to myself so I can bake it again next year without a hassle!


Ingredients (for 1 Wilton Teddy Bear Cake tin)

-440g Organic Plain Flour

-30g Corn flour

-10g Cocoa powder

-25g Aluminium Free Baking Powder

-450g Organic Soy milk

-150g Organic Maple syrup

-150 Rice bran oil (or grape seed oil, use cold pressed)


Method

Step 1: Mix all dry ingredients (flour, corn flour, cocoa powder, BP) in a large bowl; Mix all the wet ingredients (soy milk, syrup, oil) in a large bowl; Pour dry into wet, mix and bake at 180C for 20min.

I had to put some foil on the top for the last 5min because it started to brown. Very quick and easy, there is only 1 step to it!


Just remember to grease the tin well, I sprayed some oil, than tipped in extra flour to coat it. It came out nicely! Also, when you pour the mixture into the tin, use a knife and try to “cut” the center of body, arms and legs, pushing the mixture to the side of the pan as possible. This will make the mixture rise as flat as it can, if you don’t do this (which I did not last year) the center part will rise more than the other parts.


One more tip, before turning it out onto a cooling wrack, “cut/scrape off” the crust at the top (I should have taken a photo of it! sorry) If you don’t do this (which I did not last year), sometimes the arms and legs can break off (due to the unevenness of the surface/base). I hope you understand my tip, let me know if you need help in detail.


This recipe is super easy, super fast and no mistake can happen! Trust me, I’ve done it more than a dozen times, and it always comes out right!


September 20, 2012

Yumi’s Birthday Cake (daycare)

by 田草川(たくさがわ)かおる

Hi this is KK, Sushi Artist/ Healthy Muffin Maker / Mum 🙂

Thank you for visiting my blog.


This is the second birthday cake I made for Yumi this year, and it was for her daycare. Yumi was lucky enough to have her special day celebrated with her friends.


She didn’t request anything, but I decided to do an Elmo cake, since this is one of her favorite characters. And it was interesting for me to make.


20120920-142539.jpg For base, I used my No egg, No butter, No sugar cake, and used a bowl to make the shape.

When I made the Cookie Monster Cake, I used the same bowl, and some marshmallows for the eyes, but it took forever to consume the leftover marshmallows so I decided to use sponge for it this hear.


Can you guess the size from Elmo’s nose?


That’s an apricot.


It is filled with apricot jelly (better to use up the can because I only wanted 1 for the nose) and I used 300g full cream for the decoration. Takes a while for the jelly to set, to better bake the cake the day before, and do the decoration in the morning (Piping only took about 10min).


We enjoyed it with 10 small friends (Yumi is the eldest in her class) plus the staff, but I had to take about a quarter home. Daddy enjoyed it for dessert after dinner! I wonder what I should do on Saturday, for a family birthday party…

September 20, 2012

Yumi’s Brthday Cake (playgroup)

by 田草川(たくさがわ)かおる

Hi this is KK, Sushi Artisit / Healthy Muffin Maker / Mum 🙂

Thank you for visiting my blog.

My dearest daughter Yumi turned 2 on Sunday, and we did a special Sydney marathon that day, but before and after the big event, I had some birthday cakes to bake.

Here is the one that I made for playgroup. Can you tell what it is?


20120920-142430.jpg 

It’s an Alpaca!

Ever since we met an alpaca at Shoalheaven, Yumi fell in love with this animal.

She talks about it, she dreams about it, and for her birthday, she decided to eat it!

The base is using my No egg, No butter, No sugar cake recipe, I used some full cream as a decoration with as little raw sugar as possible. If you don’t like the cream, you can take it off, it’s only for the special occasion.

Shared between 12 little friends and parents, this was a perfect size for a happy day!


*I’ve been asked how much cream is required, I whipped 300g full cream with 30g sugar, this was enough to cover the cake and 2, with some remaining. Maybe 250g is enough.

June 15, 2012

Vegan banana custard tart

by 田草川(たくさがわ)かおる

Hi this is KK, Sushi Artist / Healthy Muffin Maker / Mum 🙂

Thank you for visiting my blog.


I was reading a blog of a girl who was doing a Pâtisserie Certificate at Cordon Bleu in Japan.

She was explaining all the techniques she was learning during the course, and inspired me to cook something more creative and usual. Fortunately or unfortunately, I don’t have the tools nor the ingredients (i.e: tart tins, cake tins, caster sugar, butter etc) to make something too fancy, and the furthest I could go was this vegan tart.

20120615-124442.jpg It looks more complicated than what I normally cook, but it’s not as difficult as it seems. Just break it into several steps (it doesn’t all have to be done in the same day!) and you can make your own tiny finger sweets!

It is composed of two parts:

1)Vegan tart base

and

2)Soy custard

You can decorate it with any fruit you like, strawberries, oranges, raspberries, or even a mix. My 20 month old daughter Yumi loved it, but she licked all the cream out before eating the base! It was kind of a mess after our morning tea, but if it’s tasty, that’s all that matters.


I don’t have a mini tart tin, so I used my regular muffin tin. I did not line it with paper or oil, but the base came out just fine.


Ingredients (to make 12 regular muffin tin size tart base + extras to make yummy crackers)

-30g Almond meal

-100g Organic plain flour

-120g Organic wholemeal flour

-Pinch of salt

-60g Oil (I used rice bran oil)

-60g Water

-2 Tablespoon Organic maple syrup


Step 1: Put all the dry ingredients (flours, almond meal, salt) in a food processor and mix on high for 30sec, add wet ingredients (oil, water and maple syrup) and mix on low for 30 sec. Put the mixture out onto a wrap and form a  small square, let it rest for 30min.


Step 2: Roll the mixture onto a table (with a mat, if you have one) and roll it out thinly (about 3mm) Cut it out with 11cm radius bowl or a cup and spread it into the muffin tin. Bake on 190 C preheated oven for about 12min.


Now your base is done!


Soy milk custard (to fill 12 tart)

-250ml Organic soy milk

-4 Tablespoon glutenous flour

-1-2 Tablespoon maple syrup

-1 teaspoon Organic vanilla extract


Step 1:Pour soy milk and maple syrup into a small pot, shift in flour. Cook on low heat for 5-8min, constantly stirring with a wooden spoon, when the mixture is firm and  is “pulling off” from the bottom, add vanilla and mix. Let it cool.


Now the custard is done!


All you have to do is assemble them. Drop a spoonful of custard into the tart base, and decorate it with your favorite fruit. The base and custard can be made a day before you plan to eat it, if you have leftover custard, just have it with your toast of pancake or whatever you like! Yumi loved eating the cracker I made from left over tart base mix. I think I will try it again soon myself so I will get used to making the base!